

How to Set Up SSH Keys on Windows: The Complete Beginner's Guide
Typing your server password every single time you SSH in is slow, risky, and completely unnecessary — SSH keys let you connect instantly and securely, and this guide walks you through the whole setup in about ten minutes.
Passwords feel fine until they aren't. They get brute-forced. They get leaked in breaches. You type them dozens of times a day on slow connections. And the moment you start managing more than one or two servers, the mental overhead of keeping strong, unique passwords for each one becomes genuinely painful. SSH keys solve all of this at once — and on Windows, they're easier to set up than most people expect.
This guide covers everything: what SSH keys actually are, why they're safer than passwords, how to generate them using Windows' built-in tools (no extra software needed), and how to copy them to your server so you never type a password again. If you already use MobaXterm for your SSH connections, there's a dedicated section for you too.
What Are SSH Keys? (The Simple Version)
An SSH key is a pair of files that work together like a physical lock and key:
Stays on your Windows machine. Never share it, never upload it anywhere. This is the key that unlocks the door.
Goes on your server. Safe to share and copy anywhere. This is the lock on the door.
When you connect, your computer proves it holds the private key that matches the public key on the server — without ever sending the private key over the network. If the two match, you're in. No password exchanged, nothing for an attacker to intercept.
Why SSH Keys Are Better Than Passwords
It's not even close. Here's the practical difference:
| Scenario | Password | SSH Key |
|---|---|---|
| Brute-force attack | Vulnerable — bots try millions per second | Immune — key is 256-bit, mathematically unguessable |
| Server breach | Password hash exposed and crackable | Only public key exposed — useless without your private key |
| Daily use | Type it every connection | Connect instantly, or type passphrase once per session |
| Multiple servers | Different password per server = nightmare | One key pair works on all your servers |
| Revoke access | Must change password on every server | Delete one line from authorized_keys |
| Phishing risk | Can be tricked into typing it | Private key never leaves your machine |
Watch: SSH Key Setup Step by Step
Before diving into the commands, this video walks through the entire process visually — from generating your key pair to connecting to a server without a password for the first time.
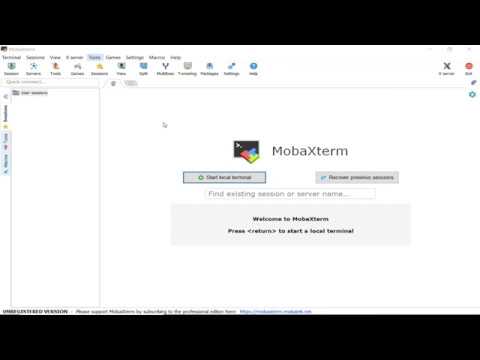
1 Generate Your SSH Key on Windows
Windows 10 and 11 ship with OpenSSH built in, which means you already have everything you need. No downloads, no extra software.
Open PowerShell
Press Windows key + X and select Terminal or Windows PowerShell. You don't need admin rights for key generation.
Run ssh-keygen
Type this command and press Enter:
ssh-keygen -t ed25519 -C "your-email@example.com"The -C flag adds a comment to identify the key — use your email or a description like "work-laptop". It doesn't affect security, just helps you recognise the key later.
Choose where to save it
You'll see:
Enter file in which to save the key (C:\Users\YourName\.ssh\id_ed25519):Press Enter to accept the default. Your keys will be saved to C:\Users\YourName\.ssh\ — that's the standard location all SSH tools expect.
Set a passphrase
Enter passphrase (empty for no passphrase):Type a passphrase and press Enter, then confirm it. Use at least 12 characters — something memorable but not guessable. This passphrase encrypts your private key on disk, so even if someone steals your laptop, they still can't use your key without it.
Verify the result
dir $env:USERPROFILE\.ssh\You should see two files:
id_ed25519— your private key. Guard this carefully.id_ed25519.pub— your public key. This is what you'll copy to servers.
Generating keys with MobaXterm
If you prefer a graphical interface and already have MobaXterm installed, it has a built-in key generator. Go to Tools → MobaKeyGen, select Ed25519, click Generate, move your mouse to create randomness, set a passphrase, and save the private key. Copy the public key text from the top box — that's what goes on your server.
2 Copy Your Public Key to the Server
Generating keys is the easy part. This step puts your public key on the server so it recognises you on login.
The one-liner method (quickest)
Windows doesn't have the ssh-copy-id command that Linux users know, but this PowerShell command does the exact same thing:
type $env:USERPROFILE\.ssh\id_ed25519.pub | ssh username@your-server.com "mkdir -p ~/.ssh && cat >> ~/.ssh/authorized_keys"Replace username with your server login name and your-server.com with your server's IP address or hostname. You'll be prompted for your password this one last time — after this, you won't need it again.
The manual method (most transparent)
If the one-liner doesn't work (some servers restrict pipe-based commands), do it manually:
- Display your public key:
type $env:USERPROFILE\.ssh\id_ed25519.pub - Copy the entire output — it starts with
ssh-ed25519and ends with your comment - SSH into your server with your password:
ssh username@your-server.com - On the server, create the .ssh directory if it doesn't exist:
mkdir -p ~/.ssh && chmod 700 ~/.ssh - Paste your public key into authorized_keys:
echo "paste-your-public-key-here" >> ~/.ssh/authorized_keys chmod 600 ~/.ssh/authorized_keys - Type
exitto disconnect
~/.ssh or authorized_keys are too loose. The 700 and 600 values above are the correct settings. If your key isn't working and you're sure it's copied correctly, wrong permissions are the most likely cause.
3 Test Your Connection
Now disconnect and reconnect using key authentication:
ssh username@your-server.comIf you set a passphrase, you'll be prompted for it — note this is your key passphrase, not your server password. If no passphrase, you'll land straight at the server prompt. Either way, you should connect without typing a server password.
If something goes wrong, add -v to see exactly what's happening:
ssh -v username@your-server.comThe verbose output will tell you which keys were tried, whether the server accepted them, and where the handshake failed. Read it top-to-bottom — the relevant error is usually near the bottom.
4 Set Up the SSH Agent (Type Your Passphrase Once)
With a passphrase on your key, you'll be asked for it every time you SSH. The SSH agent solves this — it holds your decrypted key in memory for the duration of your session, so you type the passphrase once and then connect freely.
Run these commands in PowerShell (as Administrator):
# Set agent to start automatically with Windows
Get-Service ssh-agent | Set-Service -StartupType Automatic
Start-Service ssh-agent

# Add your key to the agent (prompts for passphrase once)
ssh-add "$env:USERPROFILE\.ssh\id_ed25519"
After running ssh-add, enter your passphrase when prompted. From that point on, every SSH connection in the same session uses the agent — no passphrase required.
Bonus: Create an SSH Config File for One-Word Connections
Instead of typing ssh username@192.168.1.100 -i C:\Users\YourName\.ssh\id_ed25519 every time, an SSH config file lets you type just ssh myserver.
Create or open the config file:
notepad $env:USERPROFILE\.ssh\configAdd an entry for each server:
Host myserver
    HostName 192.168.1.100
    User username
    IdentityFile C:\Users\YourName\.ssh\id_ed25519
    Port 22
Save the file with no extension (just config, not config.txt). Now ssh myserver connects with all the right settings. You can add as many Host blocks as you need.
For the full Microsoft documentation on Windows OpenSSH key management, see the Microsoft Learn OpenSSH key management guide. For platform-specific setups like GitHub, GitHub's SSH key guide covers their particular requirements in detail.
Common Errors and How to Fix Them
"Permission denied (publickey)" — the most common error
This means the server didn't accept your key. Work through this checklist in order: (1) confirm your public key is actually in the server's ~/.ssh/authorized_keys — run cat ~/.ssh/authorized_keys on the server and look for your key; (2) check the permissions on the server — ~/.ssh must be 700 and authorized_keys must be 600; (3) make sure you're specifying the right private key with ssh -i "$env:USERPROFILE\.ssh\id_ed25519" username@server; (4) run ssh -v and read the output carefully.
"Permissions for id_ed25519 are too open"
Windows ACLs are letting other users read your private key file, which the SSH client refuses to accept. Fix it in PowerShell:
$key = "$env:USERPROFILE\.ssh\id_ed25519"
icacls $key /inheritance:r
icacls $key /grant:r "$($env:USERNAME):(F)"
icacls $key /grant:r "NT AUTHORITY\SYSTEM:(F)"
This removes inherited permissions and leaves only your account and SYSTEM with access — the minimum the SSH client requires.
"Unrecognised private key format" in MobaXterm or PuTTY
PuTTY and MobaXterm use a .ppk format, while ssh-keygen produces OpenSSH format. If you generated your key with ssh-keygen and want to use it in PuTTY, open PuTTYgen, go to Conversions → Import key, load your id_ed25519 file, then Save private key as a .ppk file. MobaXterm can do the same conversion via Tools → MobaKeyGen → Load.
I'm being asked for a passphrase on every connection
Your SSH agent isn't running or hasn't loaded your key. Run Start-Service ssh-agent in PowerShell (as Admin), then ssh-add "$env:USERPROFILE\.ssh\id_ed25519". Enter your passphrase once, and the agent will cache it for the rest of the session. If you want this to survive reboots, set the agent startup type to Automatic: Get-Service ssh-agent | Set-Service -StartupType Automatic.
Can I use the same SSH key on multiple servers?
Yes — and it's the normal way to do it. Your public key can be in the authorized_keys file on as many servers as you like. The private key never leaves your machine, so there's no security concern. What you should avoid is sharing the same private key across multiple devices (use one key per machine so you can revoke individual devices cleanly). For a deeper look at hardening your server's SSH configuration, DigitalOcean's SSH key guide covers the server side in detail.
SSH Key Best Practices in 60 Seconds
- Always use a passphrase. It's your last line of defence if a device is stolen.
- Use Ed25519, not RSA. It's faster, shorter, and equally secure for everything modern.
- One key per device. Generate a separate key pair on each machine — laptop, desktop, work VM. If one device is lost, you revoke just that key.
- Never put your private key in cloud storage. Dropbox, Google Drive, email — all off-limits. Keys stay local.
- Rotate keys once a year. Generate a new pair, add the new public key to your servers, test it, then remove the old one.
- Back up your private key to an encrypted drive. If you lose it, you'll need to regenerate and re-authorise on every server you use.
Once SSH keys are in place, logging into remote servers stops feeling like a chore. You'll click into a downloaded terminal tool, type your passphrase once at the start of the day, and then hop between servers freely for the rest of the session. If you haven't set up MobaXterm yet — the terminal that makes all of this even smoother with its built-in SFTP panel and session manager — the MobaXterm getting started guide is the natural next read.